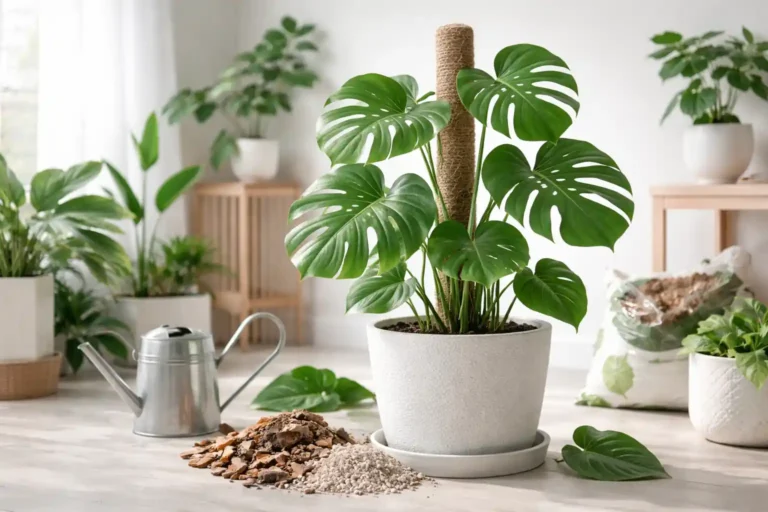
Repot at the right moment to avoid root rot, transplant shock, and “overpotting”—and help your Monstera size up safely.
Table of Contents
Quick answer
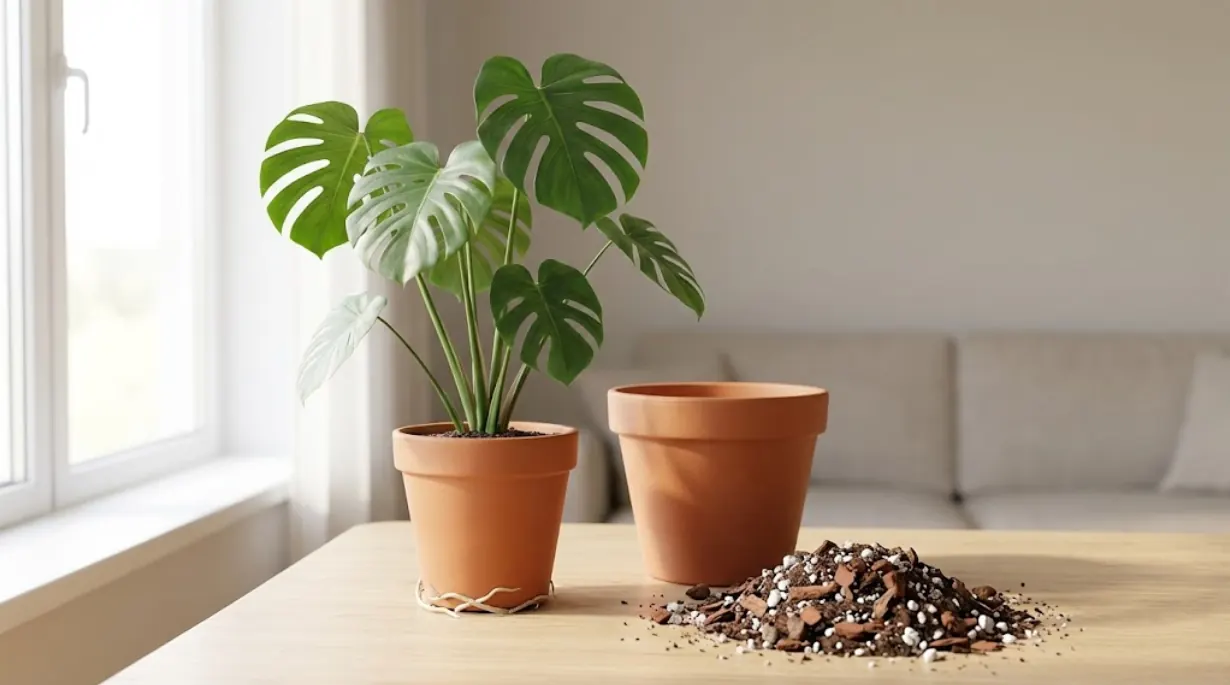
Repot Monstera deliciosa when roots line the pot’s sides/bottom or the mix has broken down and drains poorly—not just because “it’s been a year.” The safest timing is late winter through early spring, when growth resumes and recovery is faster. Size up only one pot size (maybe two for very large plants) to avoid staying wet too long.
At a glance
- Green light: roots coating sides/bottom, roots out drainage holes, or mix staying soggy for days
- Best timing: late winter → early spring
- Biggest risk: jumping to a much larger pot (“overpotting”)
30-second check: Repot now, slip-pot, refresh—or wait? (Cat-safe, low-shock guide)
Start here: You repot for roots + drainage—not for the calendar.
Repot now (best fix)
Choose a full repot (new mix + slightly larger pot) if either is true:
- Rootbound: roots form a thick mat along the bottom/sides when you slide the plant out.
- Drainage failure: the mix stays soggy for days, water pools on top, or the soil has compacted and drains poorly.
Why this is the “right now” move: crowded roots and broken-down media reduce oxygen at the root zone—repotting restores airflow and consistent watering.
Slip-pot (lowest shock)
Choose a slip-pot (minimal disturbance, small size-up) if:
- Roots are coming out of drainage holes, but the plant otherwise looks healthy (firm leaves, no rot smell, no mushy roots), and you want the gentlest option.
How to do it: move to one size up, keep the root ball mostly intact, and pack fresh airy mix around the sides.
Refresh (same pot)
Choose a refresh (same pot, partial mix upgrade) if:
- Roots haven’t reached the edges, but you want to improve drainage, reduce compaction, or replace tired top layers.
Do this: remove the top 1–2 inches of old mix, add fresh, airy medium, and confirm the pot has drainage.
Wait (best in winter mode)
Wait 2–6 weeks if all are true:
- Your home is in low-light “winter mode”,
- The plant isn’t actively growing, and
- You don’t have a drainage or root problem.
Safer alternative while waiting: refresh the top layer, improve light, and tighten watering.
How to use this guide (what “repotting” really means)
Monsteras are happiest when roots get air + fast drainage and the pot size matches the root ball. “Repotting” doesn’t always mean a bigger pot. Sometimes the best move is a refresh (new mix, same pot) or a gentle slip-pot (minimal root disturbance).
Below, we’ll share the 6 most reliable signs it’s time, the best season to do it, and the situations where we recommend holding off (plus what to do instead). We’ll also cover the safest repot method for big, climbing Monsteras—especially if you’re adding a moss pole, hanging system, or training it for a vertical wall planter setup.
Want the complete beginner-friendly Monstera roadmap (light, watering, humidity, propagation + troubleshooting)? → Read our parent guide: Monstera Care for Beginners Indoors
Best season to repot Monstera deliciosa (most reliable window)
Best time: late winter through early spring, when days lengthen and the plant naturally shifts back into active growth. In this window, Monsteras typically re-root faster, recover from minor root disturbance more smoothly, and use water more predictably, which lowers the chance of the new mix staying soggy (a common setup for root rot).
Why late winter–spring works best in real homes
- More light + longer days = more growth momentum. Monsteras are more likely to push new roots and leaves, helping them “colonize” fresh mix quickly.
- Lower post-repot rot risk. As light and warmth improve, the pot dries more evenly, so you’re less likely to keep the new mix wet for too long.
Can you repot outside spring?
Yes—if there’s a clear reason. Repot outside spring when you’re dealing with:
- Compacted or broken-down mix that stays wet or drains poorly
- Root problems (suspected rot, severe circling, or a pot that dries instantly because it’s all roots)
Off-season repot “safety rules” (to reduce transplant shock)
- Size up minimally: go up one pot size (avoid big jumps).
- Keep conditions supportive: warm room temps + bright, indirect light.
- Water conservatively: water once to settle the mix, then wait until the top layer begins to dry before watering again.
- Pause fertilizer until you see new growth resume (often 2–4 weeks).
6 signs your Monstera deliciosa should be repotted
Rule of thumb (most citation-worthy): Repot only when roots have reached the bottom and sides of the pot, and size up incrementally—Monsteras are generally more tolerant of being pot-bound than over-potted.
1) Roots “shell” the pot (bottom + sides)
What you’ll see: When you slide the plant out, roots form a thick mat at the bottom or a dense layer hugging the pot wall.
Why it matters: The rootball has used most available space, so watering becomes inconsistent (water may run down the sides or the mix dries too fast).
Best next step: Repot and move up one pot size (not a big jump).
2) Roots grow out of drainage holes (or circle tightly)
What you’ll see: Roots poking through holes, or circling around the rootball when you unpot.
Why it matters: This is a classic “container-bound” sign and often predicts harder-to-manage watering next.
Best next step: Repot soon; gently loosen circling outer roots so they grow outward in fresh mix.
3) The potting mix dries out much faster than before
What you’ll notice: You’re watering far more often, even though light/temperature haven’t changed.
Why it matters: The root-to-mix ratio is high—there’s simply not much medium left to hold moisture evenly.
Best next step: Repot with fresh, airy medium and a small pot-size increase.
4) Growth slows and the plant becomes top-heavy or unstable
What you’ll notice: Smaller/new leaves slow down, the plant leans, or the pot feels tippy—especially if you add a support pole.
Why it matters: The canopy can outgrow the pot’s stability even before roots visibly escape.
Best next step: Repot into a slightly larger (or wider, sturdier) pot with drainage, then secure support.
5) The mix has broken down, compacted, or drains poorly
What you’ll see: Water pools on top, the pot stays heavy for days, or the mix feels dense and airless.
Why it matters: Compacted media reduces aeration and can keep roots too wet. Extension guidance warns that “potting soil” products are often too dense unless amended for aeration.
Best next step: Repot into a well-aerated mix (soilless + added aeration) and don’t let the pot sit in standing water.
6) Chronic yellowing/droop despite good watering + light habits
What you’ll notice: Repeated droop/yellowing even after you’ve corrected obvious issues (watering rhythm, brighter indirect light).
Why it matters: “Mystery problems” often trace back to root oxygen/drainage problems—overwatering and poor drainage are common culprits in houseplants.
Best next step: Inspect roots. If the mix is staying wet or roots look unhealthy, repot into a better-draining setup. If roots look fine, troubleshoot pests/light/watering before repotting.

Quick decision table: what you see → what to do
| What you notice | Likely cause | Best next step |
|---|---|---|
| Roots coating bottom/sides | Pot-bound | Repot + size up slightly |
| Roots out drainage holes | Pot-bound | Repot (or “slip pot” if in-season) |
| Mix dries very fast | Too many roots / too little mix | Repot + fresh medium |
| Water pools; mix stays soggy | Compacted/broken-down medium | Repot into porous medium |
| Plant is top-heavy/tippy | Pot too small for canopy | Repot into a more stable pot (wider base) |
| Repeated droop/yellowing with correct watering | Drainage/oxygen problem | Improve drainage + medium; repot if needed |
Repot vs slip-pot vs refresh (which one you actually need)
| Option | What it means | Best when… | Biggest mistake to avoid |
|---|---|---|---|
| Full repot | Remove plant, inspect roots, replace most mix, replant (often +1 size pot) | Roots fill the pot or mix is compacted/soggy | Jumping to a much bigger pot (“overpotting”) |
| Slip-pot | Move root ball into a slightly bigger pot with minimal disturbance | Rootbound but you want lowest shock (e.g., mid-season, busy week) | Packing dense soil around the root ball (creates a wet zone) |
| Refresh (gentle reset) | Keep pot size, replace top 20–30% of mix, improve drainage/structure | Roots aren’t at pot edges yet, but you want better aeration | Doing a full teardown when it’s not needed (unnecessary stress) |
Rule of thumb: If you can’t point to a root-space problem or a media-oxygen problem, you usually don’t need a full repot yet.
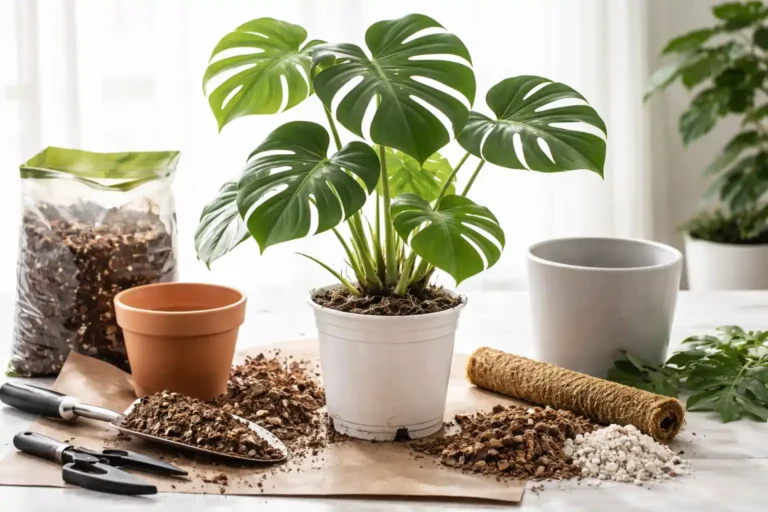
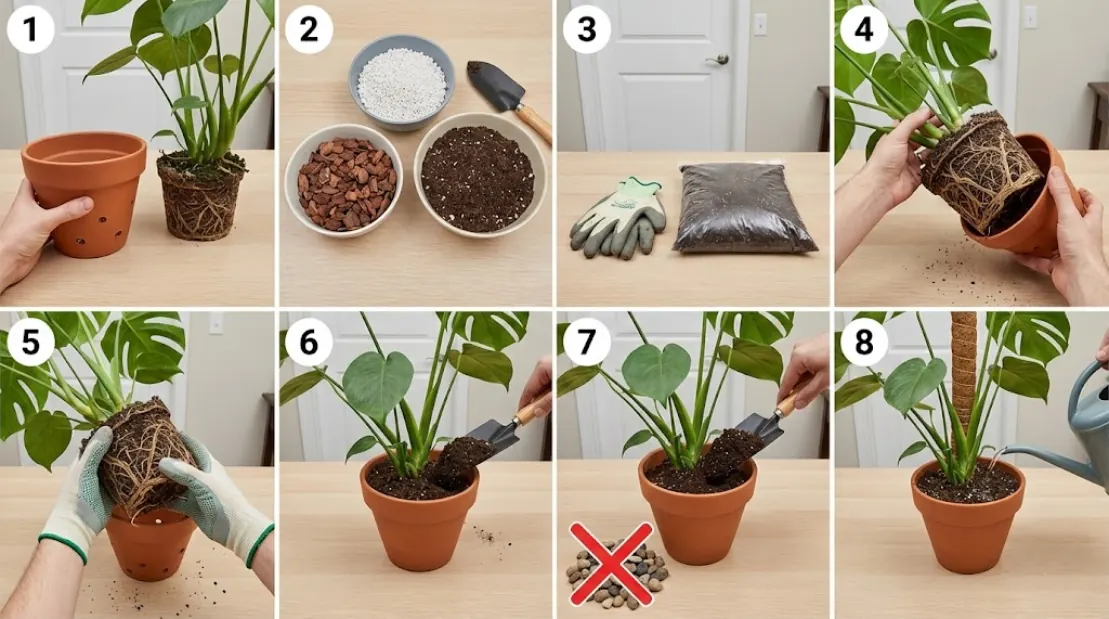
How to repot a Monstera deliciosa (low-shock method)
Low-shock rules (the whole method):
- Don’t overpot (size up incrementally). 2) Keep roots airy (porous mix). 3) Avoid a soggy zone (drainage + no gravel layer).
What you’ll need
- Pot with drainage holes (or a nursery pot inside a cachepot)
- Fresh soilless potting mix + aeration (perlite/bark chunks)
- Clean scissors/pruners, gloves, and a tarp/newspaper
Step 1) Choose a draining pot—and size up only a little
- Pick a pot with drainage holes.
- Size up incrementally (about 1–2 in / 2.5–5 cm wider for most houseplants; avoid big jumps). Oversized pots stay wet longer and raise rot risk.
- Monstera are more tolerant of being slightly pot-bound than overpotted.
If using a cachepot (no holes): keep the plant in a nursery pot, water at the sink, let it drain fully, then return it to the cachepot.
Step 2) Use a porous, well-draining medium (don’t use “potting soil” alone)
- Many products labeled “potting soil” are too dense for containers unless amended.
- Use a quality soilless mix and add aeration (e.g., perlite + bark-style chunks) to keep oxygen moving through the root zone.
Get the exact 40/30/20/10 airy aroid mix recipe (with climate tweaks) in our dedicated guide: Best Soil for Monstera: Airy Aroid Mix
Step 3) Cat-safe + people-safe prep (Monstera is irritating if chewed)
If you have cats or dogs: Monstera deliciosa contains insoluble calcium oxalates and is listed as toxic to cats/dogs. Typical signs after chewing include oral irritation/burning, drooling, vomiting, and trouble swallowing.
- Repot in a closed room (door shut), keep leaf scraps/old soil in a sealed bag, and wipe/vacuum afterward.
- If a pet chews the plant, contact your vet. ASPCA notes you can also call their Poison Control number listed on their site.
For people: chewing can cause immediate burning pain and swelling of lips/mouth/throat.
(General info only—seek medical/vet help if symptoms are significant.)
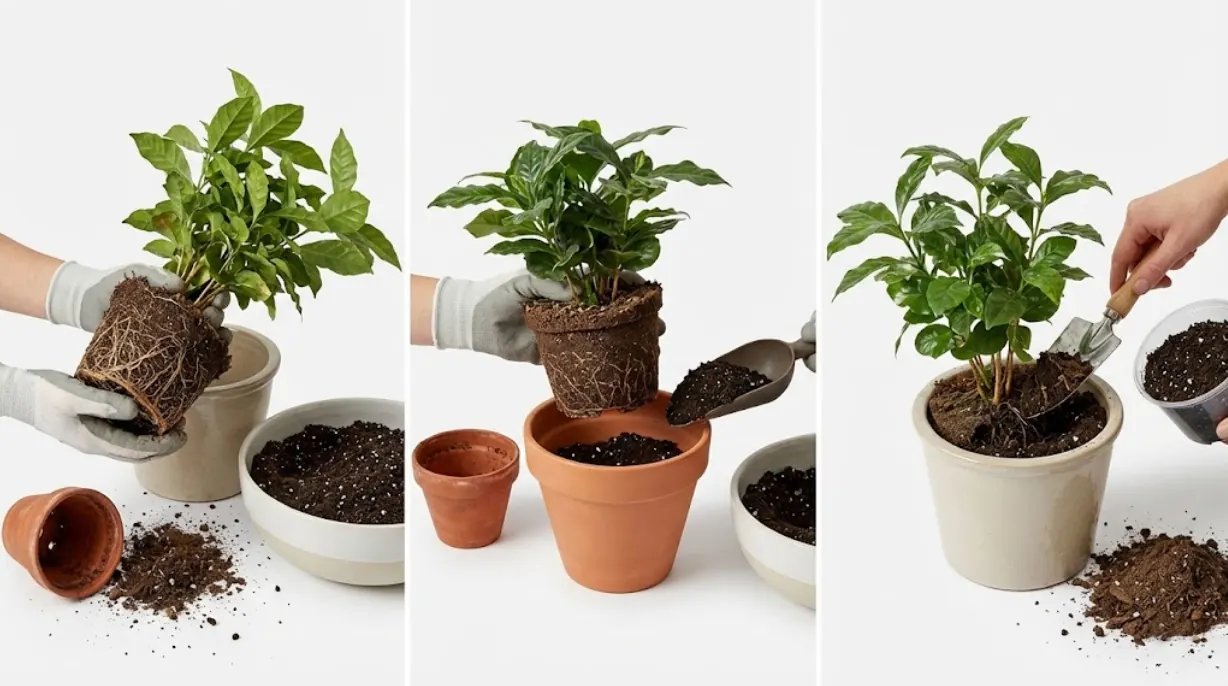
Step 4) Remove the plant without yanking the stem; inspect roots
- Tip the pot and slide the plant out—don’t pull by the stem.
- Loosen the outer root mass and remove any limp/brown/dead/mushy roots.
- If roots are tightly circling, cut/unwind some so they can grow outward.
Step 5) Replant at the same level; leave room for watering
- Place the root ball in the new pot and backfill gently (don’t compact heavily).
- Avoid piling mix up around stems; keep the crown area airy.
- Finish with the soil line ¼–½ in (0.6–1.3 cm) below the rim so water can pool and soak in.
Step 6) Skip the “rocks/gravel at the bottom” trick
- Don’t add gravel/rocks under the potting mix. It can create a wetter zone near roots and reduce drainage (water won’t move into the gravel layer until the soil above is saturated).
- If you’re worried about mix falling out, use a small screen/shard over the hole (optional).
Step 7) Water thoroughly once—then adjust
- Water until you see water come out of the drainage holes to settle the mix.
- Hold fertilizer for 2–4 weeks (fresh mix usually has some nutrients).
Step 8) Add support the smart way (moss pole / stake / trellis)
- Monstera deliciosa is a climbing plant that can be grown with a pole or trellis; adding support also reduces tipping as the plant matures.
- Install the pole during repotting to avoid damaging roots later.
Shop our best-selling Modular Moss Pole for Monstera & Philodendron (perfect for repot day installation): Modular Moss Pole for Climbing Plants. Pro tip: Pair it with our Vertical Planting Kit for wall-mounted jungle looks.
When not to repot Monstera (or when it shouldn’t be your first move)
Repotting is useful—but it’s also a stress event. Use the checks below to avoid the most common “repot regret,” especially in homes with cats.
1) You want to jump to a much bigger pot “so I won’t have to repot again”
Why to pause: Overpotting leaves a large volume of mix staying wet longer, which reduces oxygen around roots and raises root/stem rot risk. Extension guidance specifically recommends incremental pot-size increases and notes Monstera tolerates being a bit pot-bound better than being overpotted.
Do this instead: Size up one pot (occasionally two if severely rootbound), refresh the mix, and reassess later.
2) The plant isn’t actively growing and your home is in “winter mode”
Why to pause: Monsteras use less water in the low-light season; Missouri Botanical Garden advises reducing watering from fall to late winter. Fresh mix also holds water differently than old mix, which can make winter overwatering easier.
Do this instead: If there’s no urgent issue, wait for late winter/early spring, when repotting typically succeeds more smoothly for houseplants. If you must repot off-season, keep the pot increase minimal and improve light/temperature consistency.
3) The plant is already stressed from a recent big change
Why to pause: Moving, drafts/heater shifts, or watering swings can already cause droop/yellowing; repotting adds another stressor and can slow recovery.
Do this instead: Stabilize conditions first (bright indirect light, steady watering rhythm, no drafts). Repot when you see clear signs of active growth again.
4) Your only issue is “old soil,” but roots haven’t reached the pot edges
Why to pause: If roots haven’t filled the container, a full repot is often unnecessary. UConn’s guidance is to repot only when roots reach the bottom and sides (or when media/drainage problems force your hand).
Do this instead: Do a low-disturbance refresh: top-dress with a small layer of fresh medium, check drainage, and correct watering habits. (Full repot later if roots reach the pot walls or drainage declines.)
5) The plant is sick and you can’t identify the root cause yet
Why to pause: Repotting can help if roots/media are the problem, but it can also worsen stress if roots are healthy.
Do this instead: Inspect roots first. If you find root/stem rot signs (mushy, dark roots; wilt/flagging), improve drainage and repot into a well-draining medium as part of the fix.
Exception (repot anytime): If the potting mix is staying waterlogged/compacted or you see rot, repotting becomes corrective care—not “routine maintenance.”
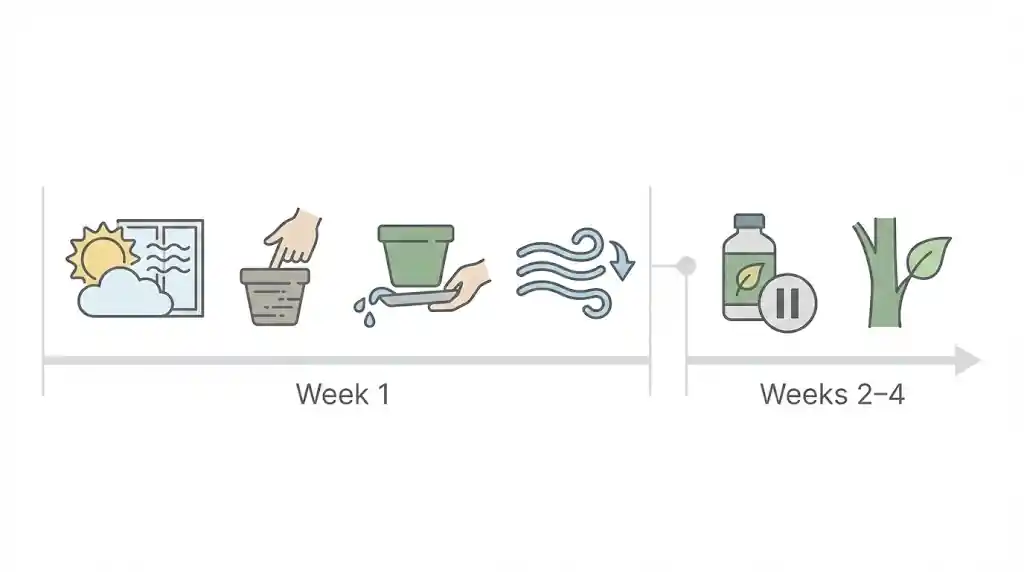
Aftercare: the first 4 weeks after repotting
Key rules (the “don’t-mess-this-up” list)
- Light: bright, indirect light for recovery; avoid harsh direct sun for 1–2 weeks.
- Water: water thoroughly once after repotting, then wait until the top layer dries before watering again (the goal is moist—not constantly wet).
- Drainage: never let the pot sit in standing water; good airflow helps the mix dry evenly.
- Fertilizer: pause fertilizing until the plant shows new growth (fresh mixes may already contain slow-release nutrients).
Master bright indirect light & grow-light setups: Monstera Light Requirements Guide & Monstera Grow Light Guide
Week 1: keep it steady (roots first)
Light
Place the plant in bright, indirect light. Avoid direct midday sun right after repotting to reduce leaf stress while roots re-establish.
Water
- After the initial watering, don’t “keep it wet.”
- Water again only when the top 1–2 inches (2–5 cm) of the mix feels dry to the touch.
- If the pot feels heavy and cool for days, the mix is staying too wet—wait longer and improve airflow.
Not sure about tap vs filtered vs RO? Best Water for Monstera (Fix Brown Tips)
What’s normal this week
- Mild droop or slower growth can happen as the plant reallocates energy to roots.
- Leaves should not be progressively yellowing or collapsing.
Weeks 2–4: let roots lead (observe, don’t overcorrect)
What to look for
- Leaf firmness improves and droop gradually decreases.
- New growth (a fresh leaf or root activity) is the best sign the plant has restarted.
Water + environment
- Continue watering only after the top layer dries.
- Keep airflow decent and avoid cold drafts.
- Make sure excess water drains freely; empty any saucer or cachepot reservoir.
Red flags (act fast)
- Increasing yellow leaves + persistent soggy mix
- Musty smell, black/mushy roots, or sudden collapse
These can indicate oxygen-starved roots or rot; the fix is usually more air + less water (and sometimes a medium change), not “extra watering.”
Fertilizer timing (when to restart feeding)
Fresh, high-quality potting mixes often include slow-release nutrients that can feed plants for weeks to months, so adding fertilizer immediately can be unnecessary (and sometimes stressful).
Best practice: hold fertilizer until you see clear signs of resumed growth, then restart at a light dose.
Common repotting mistakes & fixes (Monstera, with a cat-safe home in mind)
Mistake 1: Overpotting (jumping to a much bigger pot).
Why it backfires: Extra unused mix stays wet longer, lowering oxygen around roots and increasing rot risk.
Fix: Size up incrementally (one pot size at a time). Monsteras generally handle being slightly pot-bound better than sitting in too much wet media. (Evidence: University of Connecticut Home & Garden Education Center — Monstera guidance.)
Mistake 2: Using a dense, soggy medium (“potting soil” alone).
Why it backfires: Compacted mixes drain slowly and limit airflow, which stresses roots after repotting.
Fix: Use a porous, soilless indoor mix and add aeration materials (e.g., perlite + bark-style chunks) so water drains fast while still holding some moisture. (Evidence: University of Maryland Extension — indoor potting media guidance.)
Mistake 3: No drainage hole (decorative pot only).
Why it backfires: Water collects at the bottom, creating a persistent “wet zone.”
Fix: Choose a pot with drainage. If you prefer a cachepot, keep the plant in a nursery pot inside it so you can fully drain after watering. (Best-practice: horticultural extension container guidance.)
Mistake 4: Adding rocks/gravel to the bottom “for drainage.”
Why it backfires: It can create a perched water layer—keeping moisture closer to roots, not less.
Fix: Skip the rocks. Improve drainage by choosing the right medium + a pot with holes. (Evidence: Iowa State University Extension — drainage myth guidance.)
Mistake 5: Reusing dirty pots/tools.
Why it backfires: Old containers and tools can carry pathogens between plants.
Fix: Wash and disinfect pots and tools before reuse, especially if the previous plant had root issues. (Evidence: Iowa State University Extension — container sanitation.)
Quick sanitation note (simple, repeatable, citation-ready)
Disinfecting used pots (standard extension method):
- Wash soil/debris off first.
- Soak in a solution of 1 part household bleach : 9 parts water for at least 10 minutes.
- Rinse thoroughly and let pots fully dry before replanting. (Evidence: Iowa State University Extension — cleaning/disinfecting containers.)
FAQ
How often should I repot a Monstera deliciosa?
Don’t repot on a fixed schedule. Repot when roots densely line the pot’s sides/bottom (or grow out of drainage holes), or when the potting mix has broken down and no longer drains well—those are the most reliable “it’s time” signals.
Can Monsteras stay slightly root-bound?
Yes. A slightly snug pot is usually fine, and Monsteras tend to tolerate being a bit pot-bound better than being overpotted (too much wet mix around too few roots increases rot risk).
Should I water right after repotting?
Yes—water once thoroughly until water drains from the bottom to settle the mix around the roots. Then switch to “recovery mode”: wait until the top layer of mix starts to dry before watering again, and avoid keeping the pot constantly wet while new root hairs re-establish.
Should I add a moss pole when I repot?
If you plan to use one, repot day is the safest time to install it—placing a pole later can stab or tear established roots. Monsteras are natural climbers and can be trained with a pole/trellis for support.
Is Monstera deliciosa safe around cats and dogs?
No. Monstera deliciosa is toxic to cats and dogs (insoluble calcium oxalate crystals). Chewing can cause mouth irritation, drooling, vomiting, and trouble swallowing. Keep it out of reach; if your cat/dog bites it, remove any plant pieces you can safely see and contact your veterinarian or a pet poison control resource promptly.
Key Points
- Repot when roots reach the bottom/sides and the pot is genuinely filled—not “just because.”
- Best timing is late winter to early spring for faster recovery.
- Size up one (maybe two) pot sizes, not a giant jump.
- Use a porous, well-draining medium; avoid dense “potting soil” unless amended.
- Skip rocks/gravel at the bottom—they can create a wetter root zone.
- Monsteras tolerate being slightly pot-bound better than being overpotted.
- After repotting: water once thoroughly, then let the mix begin to dry before watering again.
- Keep plants and trimmings away from pets—Monstera is toxic to cats and dogs.
Ready to give your Monstera the perfect new home? Shop our full collection of breathable, drainage-first indoor planters (including root-control and self-watering options perfect for Monsteras): Indoor Planters & Pots for Tropical Plants
Sources
University of Connecticut Home & Garden Education Center. (Revised 2020). Monstera deliciosa (factsheet)
Iowa State University Extension and Outreach. (April 15, 2024). Yard and Garden: Spring Houseplant Care.
Royal Horticultural Society (RHS). (2026). How to repot a plant: Expert Guide.
N.C. Cooperative Extension (Wayne County). (April 2022). How to Repot a Houseplant.
University of Maryland Extension. (2026). Potting and Repotting Indoor Plants.
University of Illinois Extension. (2023). Houseplants: Get Started (containers + potting mix basics).
ASPCA Animal Poison Control. (2026). Toxic and Non-toxic Plants: Swiss Cheese Plant (Monstera deliciosa).
Queensland Poisons Information Centre. (2026). Fruit salad plant (Monstera deliciosa).
Missouri Botanical Garden. (2026). Monstera deliciosa – Plant Finder.
Iowa State University Extension and Outreach. (2026). How to Clean and Disinfect Plant Containers.