If you grow Monstera indoors, there usually comes a point when the plant starts to feel… big.
Not unhealthy — just ambitious. Long stems, oversized leaves, aerial roots reaching for anything nearby. What once fit neatly into a corner now takes up a surprising amount of space.
At that moment, many people assume they have only two options: keep fighting the growth, or give the plant away. In reality, there’s a third — and much more satisfying — option: propagation.
Propagating Monstera isn’t only about making more plants. It’s a practical way to manage size, refresh growth, rescue struggling sections, and turn one established plant into several healthy ones. You can keep them, gift them to friends, or even sell rooted cuttings as a bit of side income. Most importantly, Monstera is extremely forgiving. When done correctly, propagation doesn’t weaken the plant — it often improves it.
This guide walks through three reliable Monstera propagation methods that work especially well indoors:
water propagation, direct soil or moss propagation, and aerial layering. These are methods real growers use, not theoretical techniques. They’re beginner-friendly, low-risk, and adaptable to different situations.
Table of Contents
If you prefer seeing the process rather than just reading about it,
I’ve put together a more detailed walkthrough in a video.
In the video, I go through the same propagation methods step by step,
showing how I decide where to cut, what the nodes look like in real plants,
and how each method behaves over time.
You can watch it here if that’s helpful —
especially if this is your first time propagating Monstera.
Understanding One Key Rule Before You Start
Before getting into methods, there’s one concept that matters more than anything else: the node.
A node is the section of stem where leaves, aerial roots, and new growth points emerge. Without a node, a Monstera cutting cannot produce new growth. Leaves alone won’t root, no matter how healthy they look.
If you remember nothing else from this article, remember this:
every cutting must include at least one healthy node.
Once that’s clear, everything else becomes much simpler. We mentioned the basic knowledge of monstera in this article, click to read more.
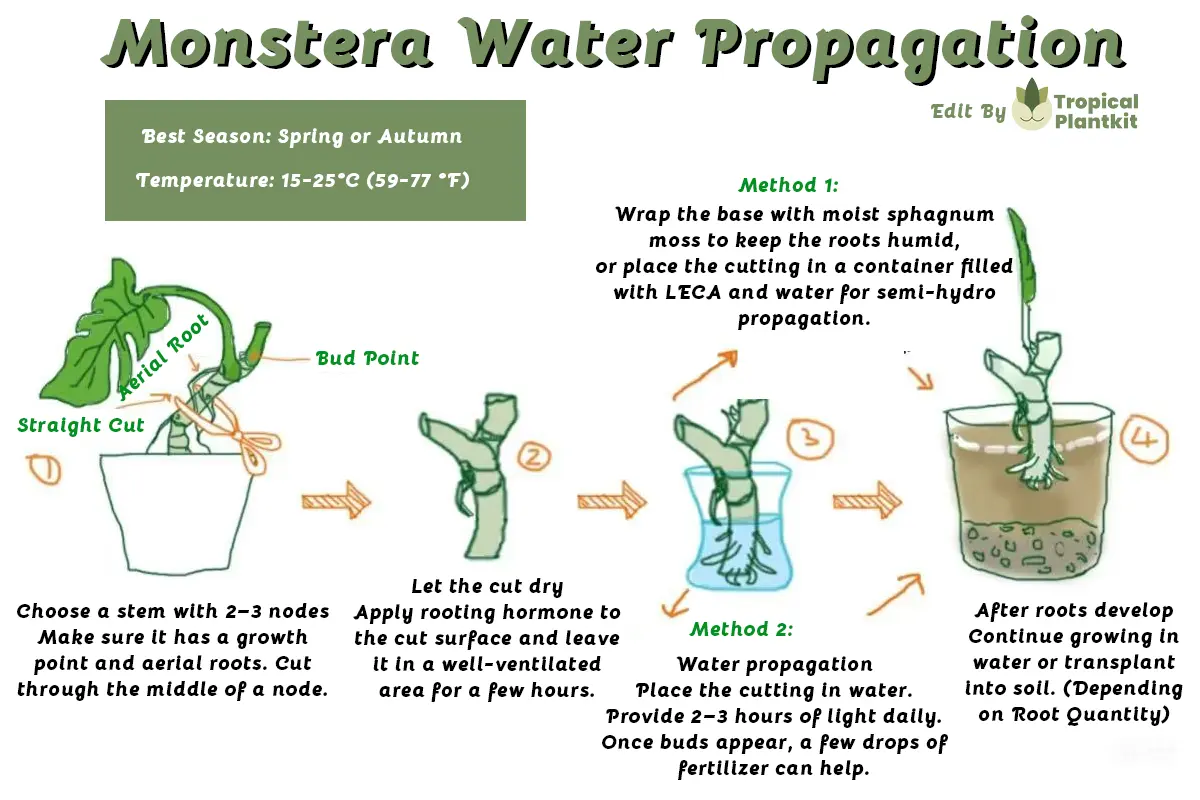
Method 1: Water Propagation (The Most Approachable Starting Point)
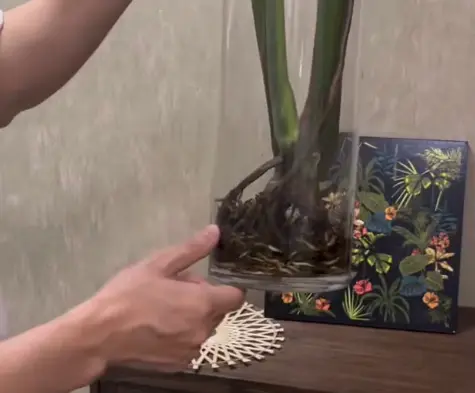
Water propagation is often where people begin, and for good reason. It’s visually reassuring, requires minimal setup, and allows you to see exactly what’s happening beneath the surface.
To start, take a clean cutting with a visible node. Place only the node into water, keeping the leaf and stem above the water line. A simple glass jar or container is enough. The setup doesn’t need to be fancy — clarity matters more than aesthetics because being able to see root development helps you understand timing.
Place the cutting in bright, indirect light. Direct sun isn’t necessary and can stress the leaf. Over time, as the water level drops due to evaporation, simply top it up. There’s no need to constantly replace the water unless it becomes cloudy or smells off.
Within a couple of weeks, small white roots usually begin to appear. Over the following weeks, these roots lengthen and branch. Watching this process is one of the biggest advantages of water propagation. For beginners, it removes uncertainty — you can tell immediately whether the cutting is doing well.
Water propagation works particularly well when:
- you’re propagating for the first time
- you want to monitor progress closely
- you plan to gift or pass on cuttings once rooted
One thing to keep in mind is that water-grown roots are softer and more delicate than soil-grown roots. When transferring the plant to soil later, it’s normal for growth to slow briefly while the roots adapt. This isn’t a failure — just a transition.
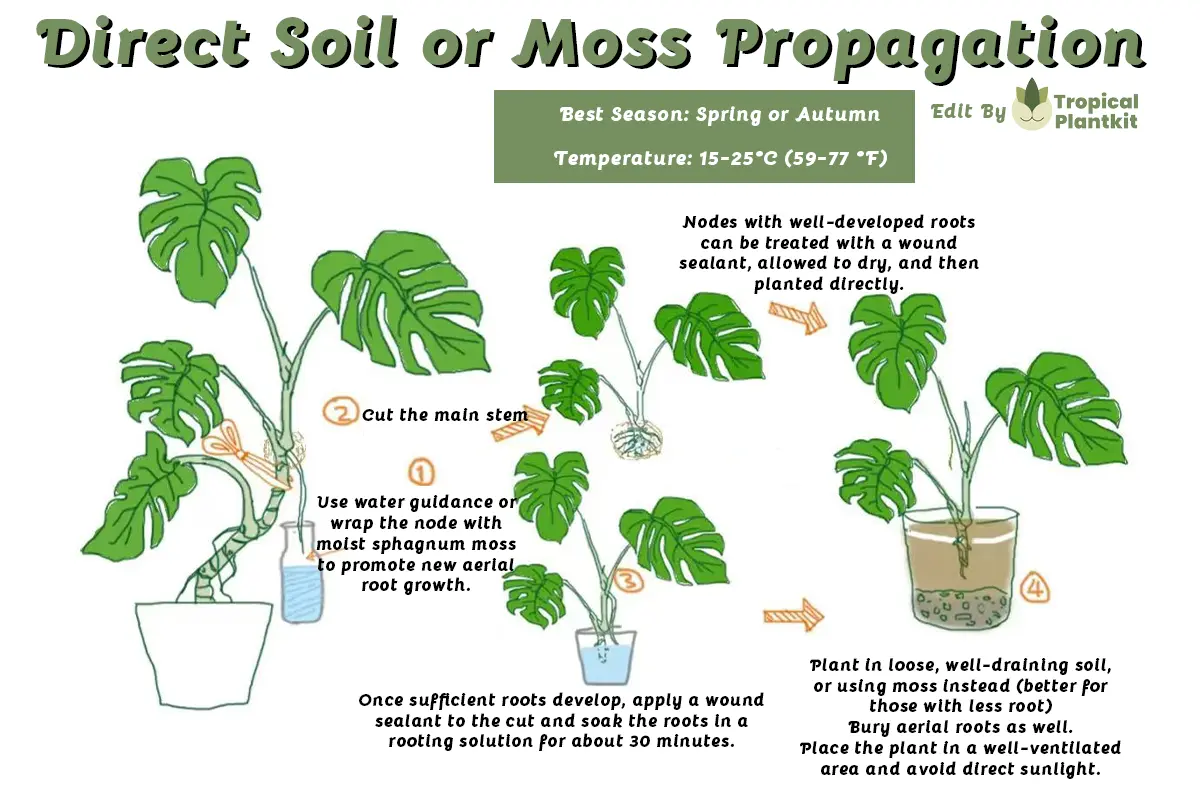
Method 2: Direct Soil or Moss Propagation (Skipping Water Entirely)
Direct soil or moss propagation is often misunderstood as “more advanced,” but in many cases it’s simply more logical.
This method is especially useful when your Monstera already has some root development — for example, when it’s been growing on a moss pole and has produced aerial roots that have started to harden.
Instead of rooting the cutting in water first, you skip that step entirely.
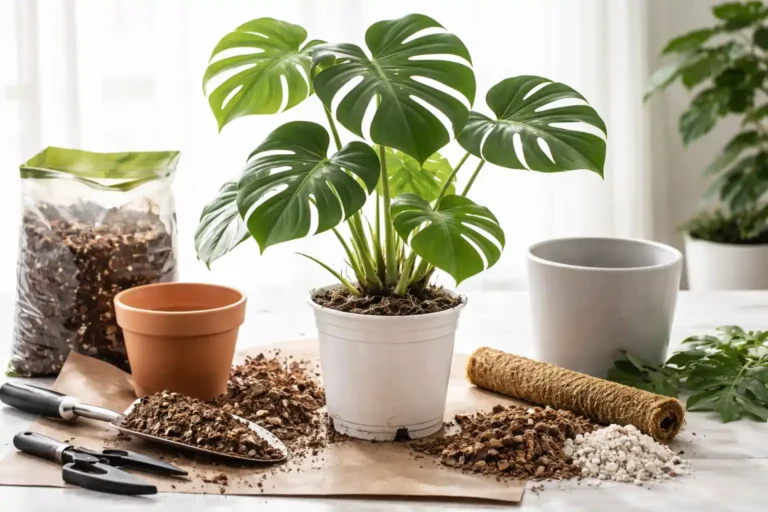
After taking the cutting, allow the cut surface to air-dry for a short period. This helps reduce the risk of rot. Some growers also apply a wound sealant or rooting aid, but this isn’t strictly necessary if the environment is well-managed.
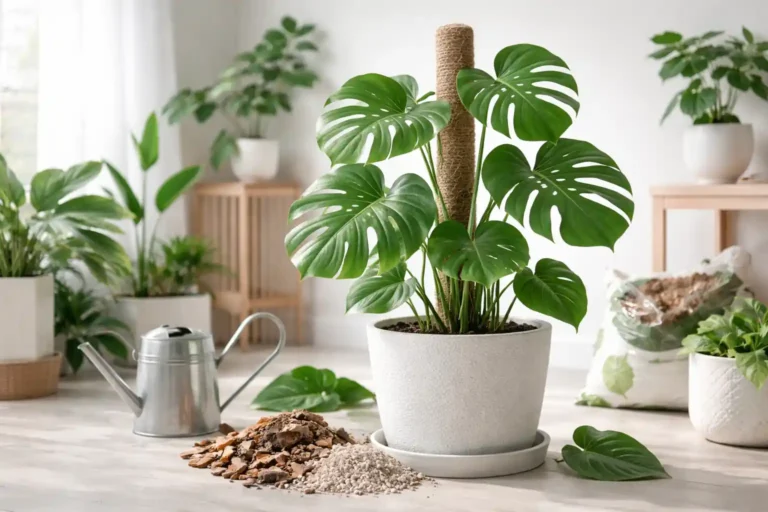
Once the cut has dried slightly, plant the cutting directly into a chunky, well-draining aroid mix. The soil should be loose and airy, not dense or compacted. Large particles allow oxygen to reach developing roots, which is far more important than constant moisture.
After planting, water thoroughly so the soil settles around the node and any existing roots. From there, resist the urge to overwater. Let the plant settle and establish itself naturally.
This approach works well because the roots grow directly in their final environment. There’s no transition period from water to soil, which can make long-term growth feel more stable.
Direct soil or moss propagation is particularly suitable when:
- the cutting already shows aerial root development
- you’re working with thicker, more mature stems
- you want to minimize handling and transplant stress
When done properly, this method is both simple and efficient — and often faster than water propagation in the long run.
Method 3: Aerial Layering (Fast, Stable, and Highly Predictable)
Aerial layering is one of the most effective propagation methods for Monstera, especially when speed and reliability matter.
The idea is straightforward: instead of cutting first and hoping roots develop later, you encourage roots to grow while the stem is still attached to the main plant.
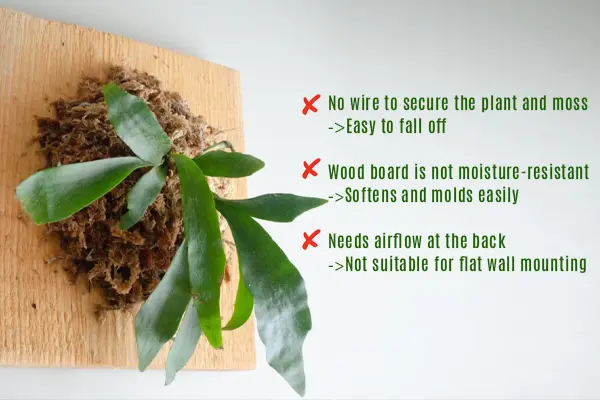
To do this, you make a partial cut just below a node. The cut should be deep enough to interrupt the stem slightly but not so deep that it severs it completely. Many growers place a small piece of plastic or similar material into the cut to prevent it from closing back up.
Next, wrap the area with moist sphagnum moss and secure it with plastic wrap or similar material. The goal is to keep the area consistently humid while still allowing airflow.
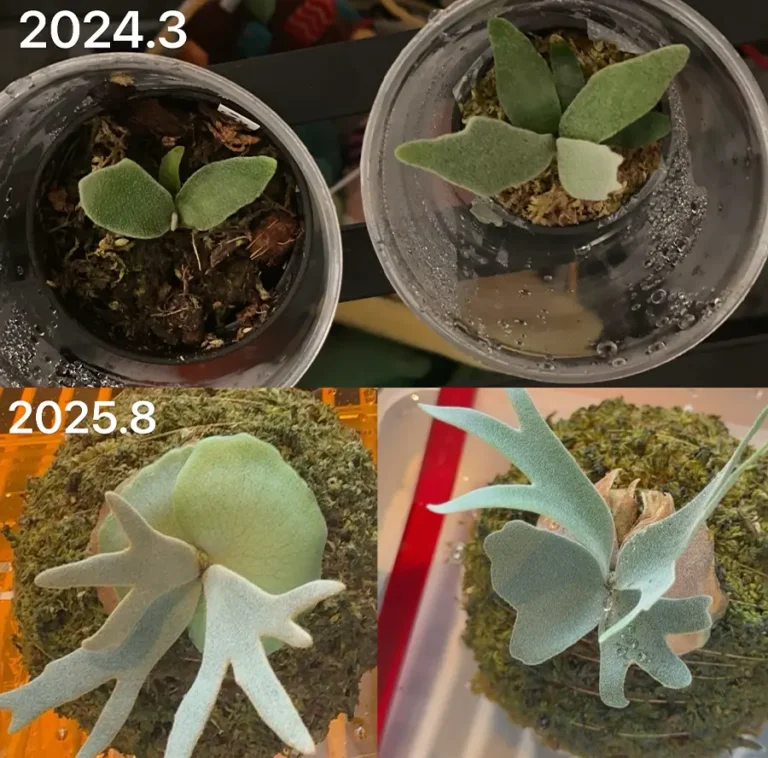
Because the stem remains connected to the mother plant, it continues receiving water and nutrients throughout the rooting process. This makes aerial layering both fast and predictable. Root development often begins sooner than with detached cuttings.
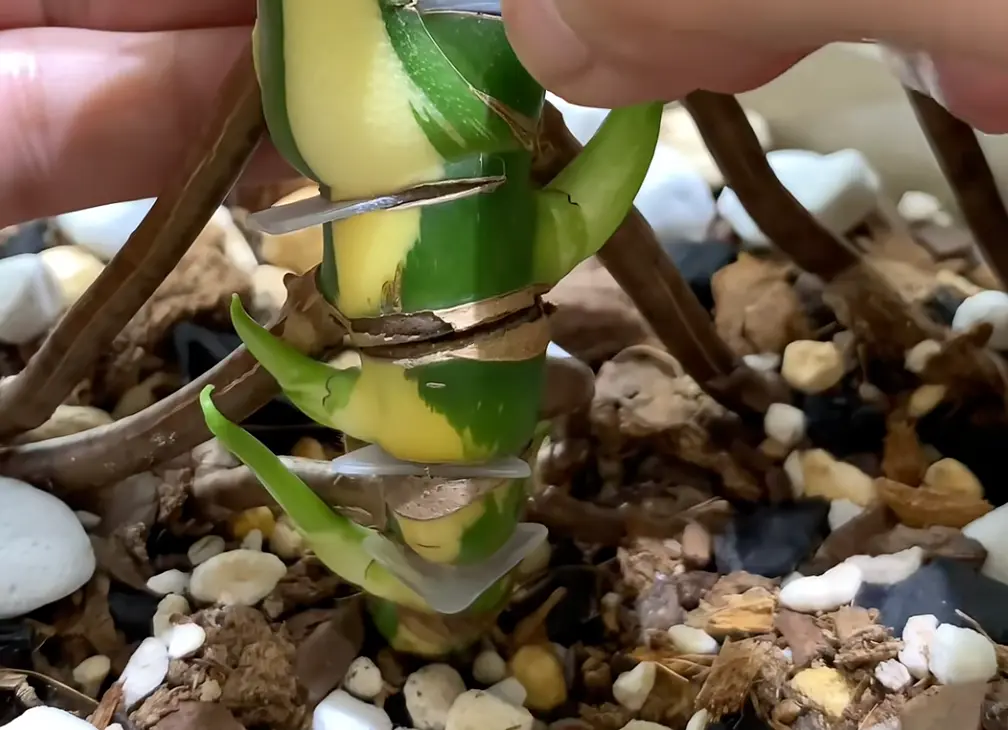
Once you can see a healthy amount of roots forming within the moss, the section can be cut off and planted. At this point, the new plant is already well-established, and transplant shock is minimal.
Aerial layering is often chosen because:
- it speeds up propagation
- it reduces risk compared to detached cuttings
- it works extremely well for valuable or slow-growing plants
For many growers, this becomes the preferred method once they’re comfortable working with their plants.
What to Do After Separating the Cutting
Once a cutting is fully separated from the main plant, the next step depends on root development.
If the cutting already has a strong root system, it can be planted directly into soil. Water thoroughly and allow it to settle in.
If the roots are present but still limited, starting the cutting in water is also a perfectly valid option. This allows the roots to strengthen before moving into soil.
There’s no single “correct” choice here. Both approaches work well, and Monstera tolerates either transition without much trouble.
The key is to avoid overthinking the process. These plants are resilient, and the methods described here are deliberately forgiving.
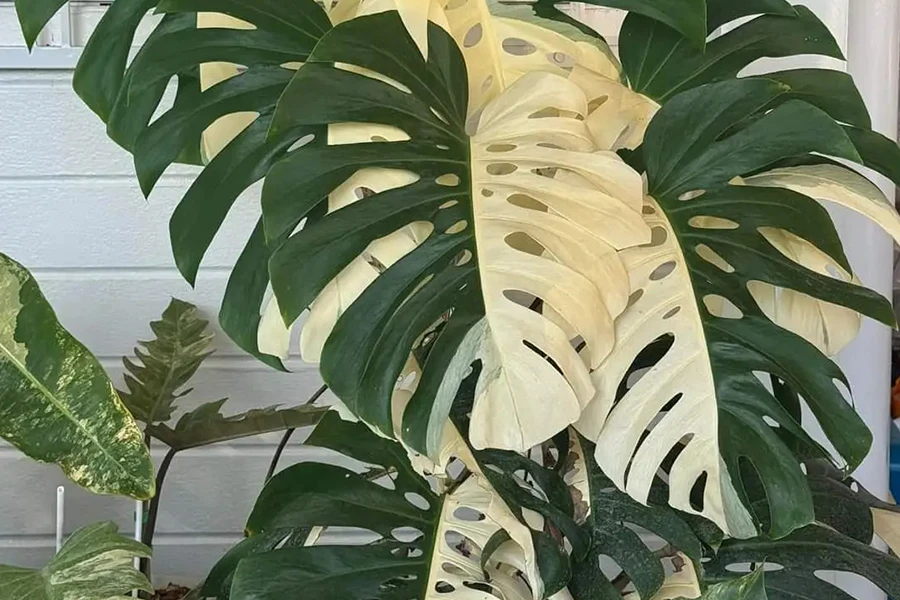
Can Propagation Help With Variegated Monstera Losing Color?
Yes — and this is one of the most practical reasons people propagate variegated Monstera.
If a variegated plant begins producing all-green leaves, it often means the growth point has shifted to a non-variegated section of the stem. By cutting back to a node that shows visible variegation, you encourage new growth from that area instead.
What many people don’t realize is that cutting doesn’t end the plant’s life. The base and middle sections often respond by pushing out new shoots and leaves. Propagation, in this sense, becomes a way to reset growth direction rather than reduce the plant.
Common Beginner Mistakes (and How to Avoid Them)
Most propagation failures don’t happen because the method is wrong — they happen because of small, avoidable issues.
Cutting without a node is the most common mistake. No node means no new growth, regardless of how healthy the leaf looks.
Overwatering is another frequent problem, especially with soil propagation. Monstera roots need oxygen just as much as moisture. Dense, constantly wet soil creates stress, not stability.
Finally, impatience causes more harm than anything else. Roots develop on their own timeline. Checking constantly or moving the cutting too often disrupts that process.
Why Monstera Is One of the Best Plants to Learn Propagation With
Monstera responds exceptionally well to being cut, redirected, and restarted. It regenerates from multiple points, tolerates a range of environments, and communicates clearly through its growth.
For beginners, this means less pressure. You don’t need perfect conditions or specialized equipment to succeed. As long as you understand nodes, provide light, and avoid extremes, the plant does most of the work for you.
That’s why these propagation methods are widely used — not because they’re trendy, but because they work.
More To Read about Monstera:
- Monstera Grow Light Guide: Distance, Hours & Best LED Setup
- Image Guide to 10 beginner-friendly Monstera varieties
- Image Guide to 10 Expensive and Rare Monstera Varieties with Price List
Final Thoughts
Propagating Monstera isn’t about forcing a plant to multiply. It’s about working with its natural growth habits and making indoor life more manageable — for both you and the plant.
Whether you choose water propagation, direct soil or moss planting, or aerial layering, these methods are all reliable and difficult to mess up. Take your time, observe your plant, and choose the approach that fits your situation.
With a little patience, one Monstera can easily become many — and every one of them has the potential to thrive.
FAQ About Monstera Propagation
Can I propagate Monstera without a node?
No. A Monstera cutting must include at least one node to produce new growth.
Leaves without a node may stay green for a while in water, but they will never grow roots or new leaves.
Where exactly should I cut a Monstera for propagation?
Cut just below a node, using clean, sharp pruning shears.
The node is where roots and new shoots form, so it needs to stay attached to the cutting.
Is water propagation or soil propagation better for beginners?
Water propagation is usually easier for beginners because you can see root development.
Soil or moss propagation skips the transplant step and can produce stronger roots long term, but it requires better moisture control.
Do I need to change the water during water propagation?
Not necessarily.
If the water level drops, simply top it up. As long as the water stays clear and odor-free, frequent changes aren’t required.
How long does it take for Monstera cuttings to root?
Most Monstera cuttings start forming roots within 2–4 weeks, depending on light, temperature, and the health of the cutting.
Aerial layering can be faster because the stem is still attached to the mother plant.
Can I plant a Monstera cutting directly into soil?
Yes.
If the cutting already has aerial roots or visible root growth, you can plant it directly into a chunky, well-draining soil mix after letting the cut dry.
What is aerial layering, and why do people use it?
Aerial layering is a method where roots are encouraged to grow before the stem is cut off.
It’s popular because it’s fast, stable, and low-risk, especially for valuable or mature Monsteras.
Should I let the cut dry before planting?
Yes. Letting the cut air-dry briefly or applying a wound sealant helps reduce the risk of rot, especially when planting directly into soil.
Can propagation help a variegated Monstera that’s losing color?
Yes,
If a variegated Monstera starts producing all-green leaves, cutting back to a node with visible variegation can encourage new, more balanced growth.
Is Monstera propagation risky?
Not really.
Monstera is a very forgiving plant, and the common propagation methods — water, soil/moss, and aerial layering — are hard to mess up when basic steps are followed. Pay attention to the watering frequency is important, do not let it dry.