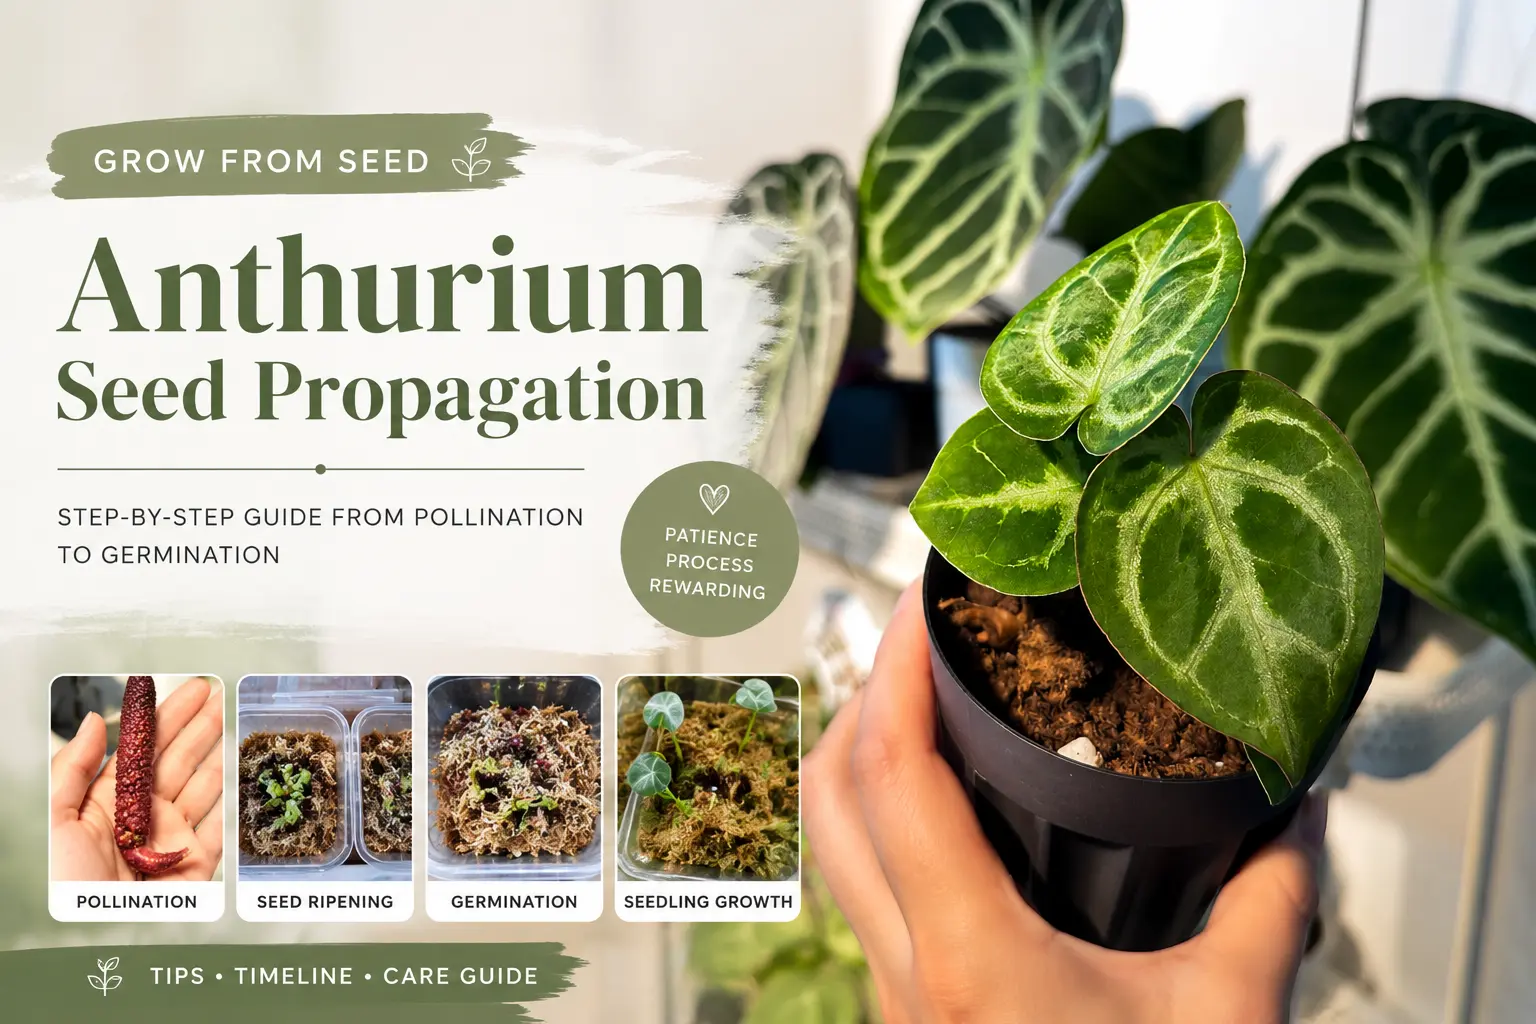
I spent 100 days documenting my first Anthurium hybridization from start to finish — from the moment the first spadix appeared, all the way to watching tiny seedlings push up through sphagnum moss.
Honestly? I expected it to be complicated. It wasn’t. The process is mostly just waiting, paying attention at the right moments, and not panicking when nothing seems to be happening. If you understand a few key things going in, your success rate can realistically hit 90% or higher — and that’s exactly what this guide is here to help you do.
I’ll walk you through each stage in plain language: when to pollinate, how to collect and store pollen, how to read whether it worked, when to harvest, and how to get your seeds to germinate. I’ll also flag a few species that are notoriously difficult to work with — so you don’t waste a whole season on a cross that the community has already written off.
If you’re new to growing Anthuriums, start with the TropicalPlantKit Anthurium crystallinum care guide first. For collector-level species, the Red Crystallinum guide is also worth reading before you attempt your first pollination.
Table of Contents
The One Thing You Need to Understand First about anthurium hybrid
Anthurium “flowers” are actually made up of two parts: the spathe (the flat, waxy leaf-like part) and the spadix (the central spike covered in tiny individual flowers). All the action happens on the spadix.
Here’s the key thing: every flower on the spadix goes through two phases — female first, then male. The plant does this on purpose to avoid pollinating itself. Your job as a hobbyist breeder is simply to understand which phase you’re looking at, because you can only pollinate during the female phase. That’s really the whole foundation of this.

The inflorescence is made up of the spathe and the spadix — the true flowers are the tiny structures packed along the spadix. Image: Granthuriums
Step 1: Identify the Female Phase — Your Pollination Window
This is the step most beginners miss or mistime.
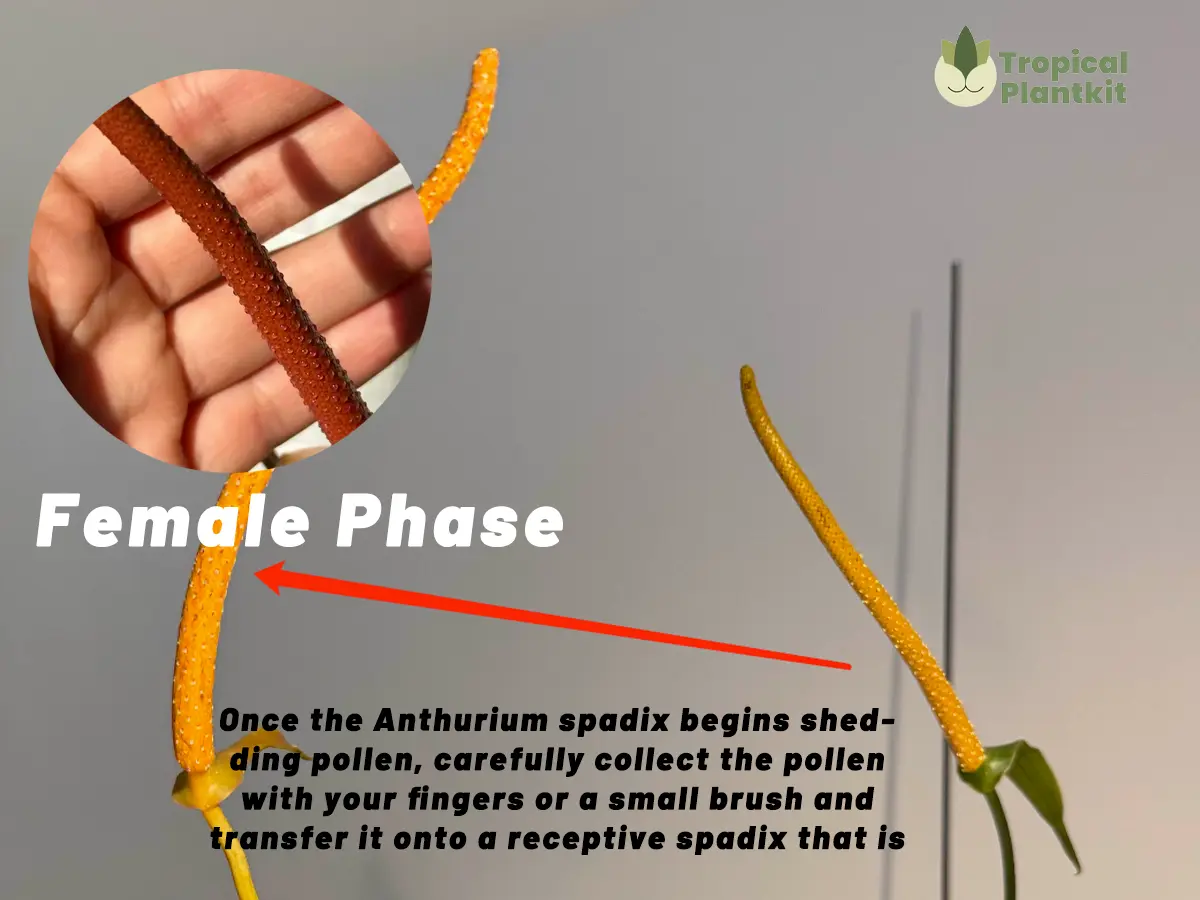
The female phase (receptive phase) is when the flowers on the spadix are ready to receive pollen. It’s signaled by tiny, glistening droplets of stigmatic fluid appearing along the surface of the spadix — typically starting at the base and progressing toward the tip over 1–2 days.
This fluid is sticky and slightly viscous, designed to catch and hold pollen grains. As a visual cue, think of the spadix surface as looking wet and shiny — almost like it’s been lightly glazed.
The female phase is short. In most velvet-leaf species, it lasts only 1–2 days. If you miss it, you wait for the next bloom cycle.
The best time to apply pollen is in the morning, typically between 6:30 and 10:00 a.m. when stigmatic fluid production is at its peak.
Step 2: Collect or Prepare Your Pollen
Pollen appears during the male phase, which follows the female phase. The timing gap between the end of female receptivity and the start of pollen production varies widely by species — anywhere from one day to several weeks.
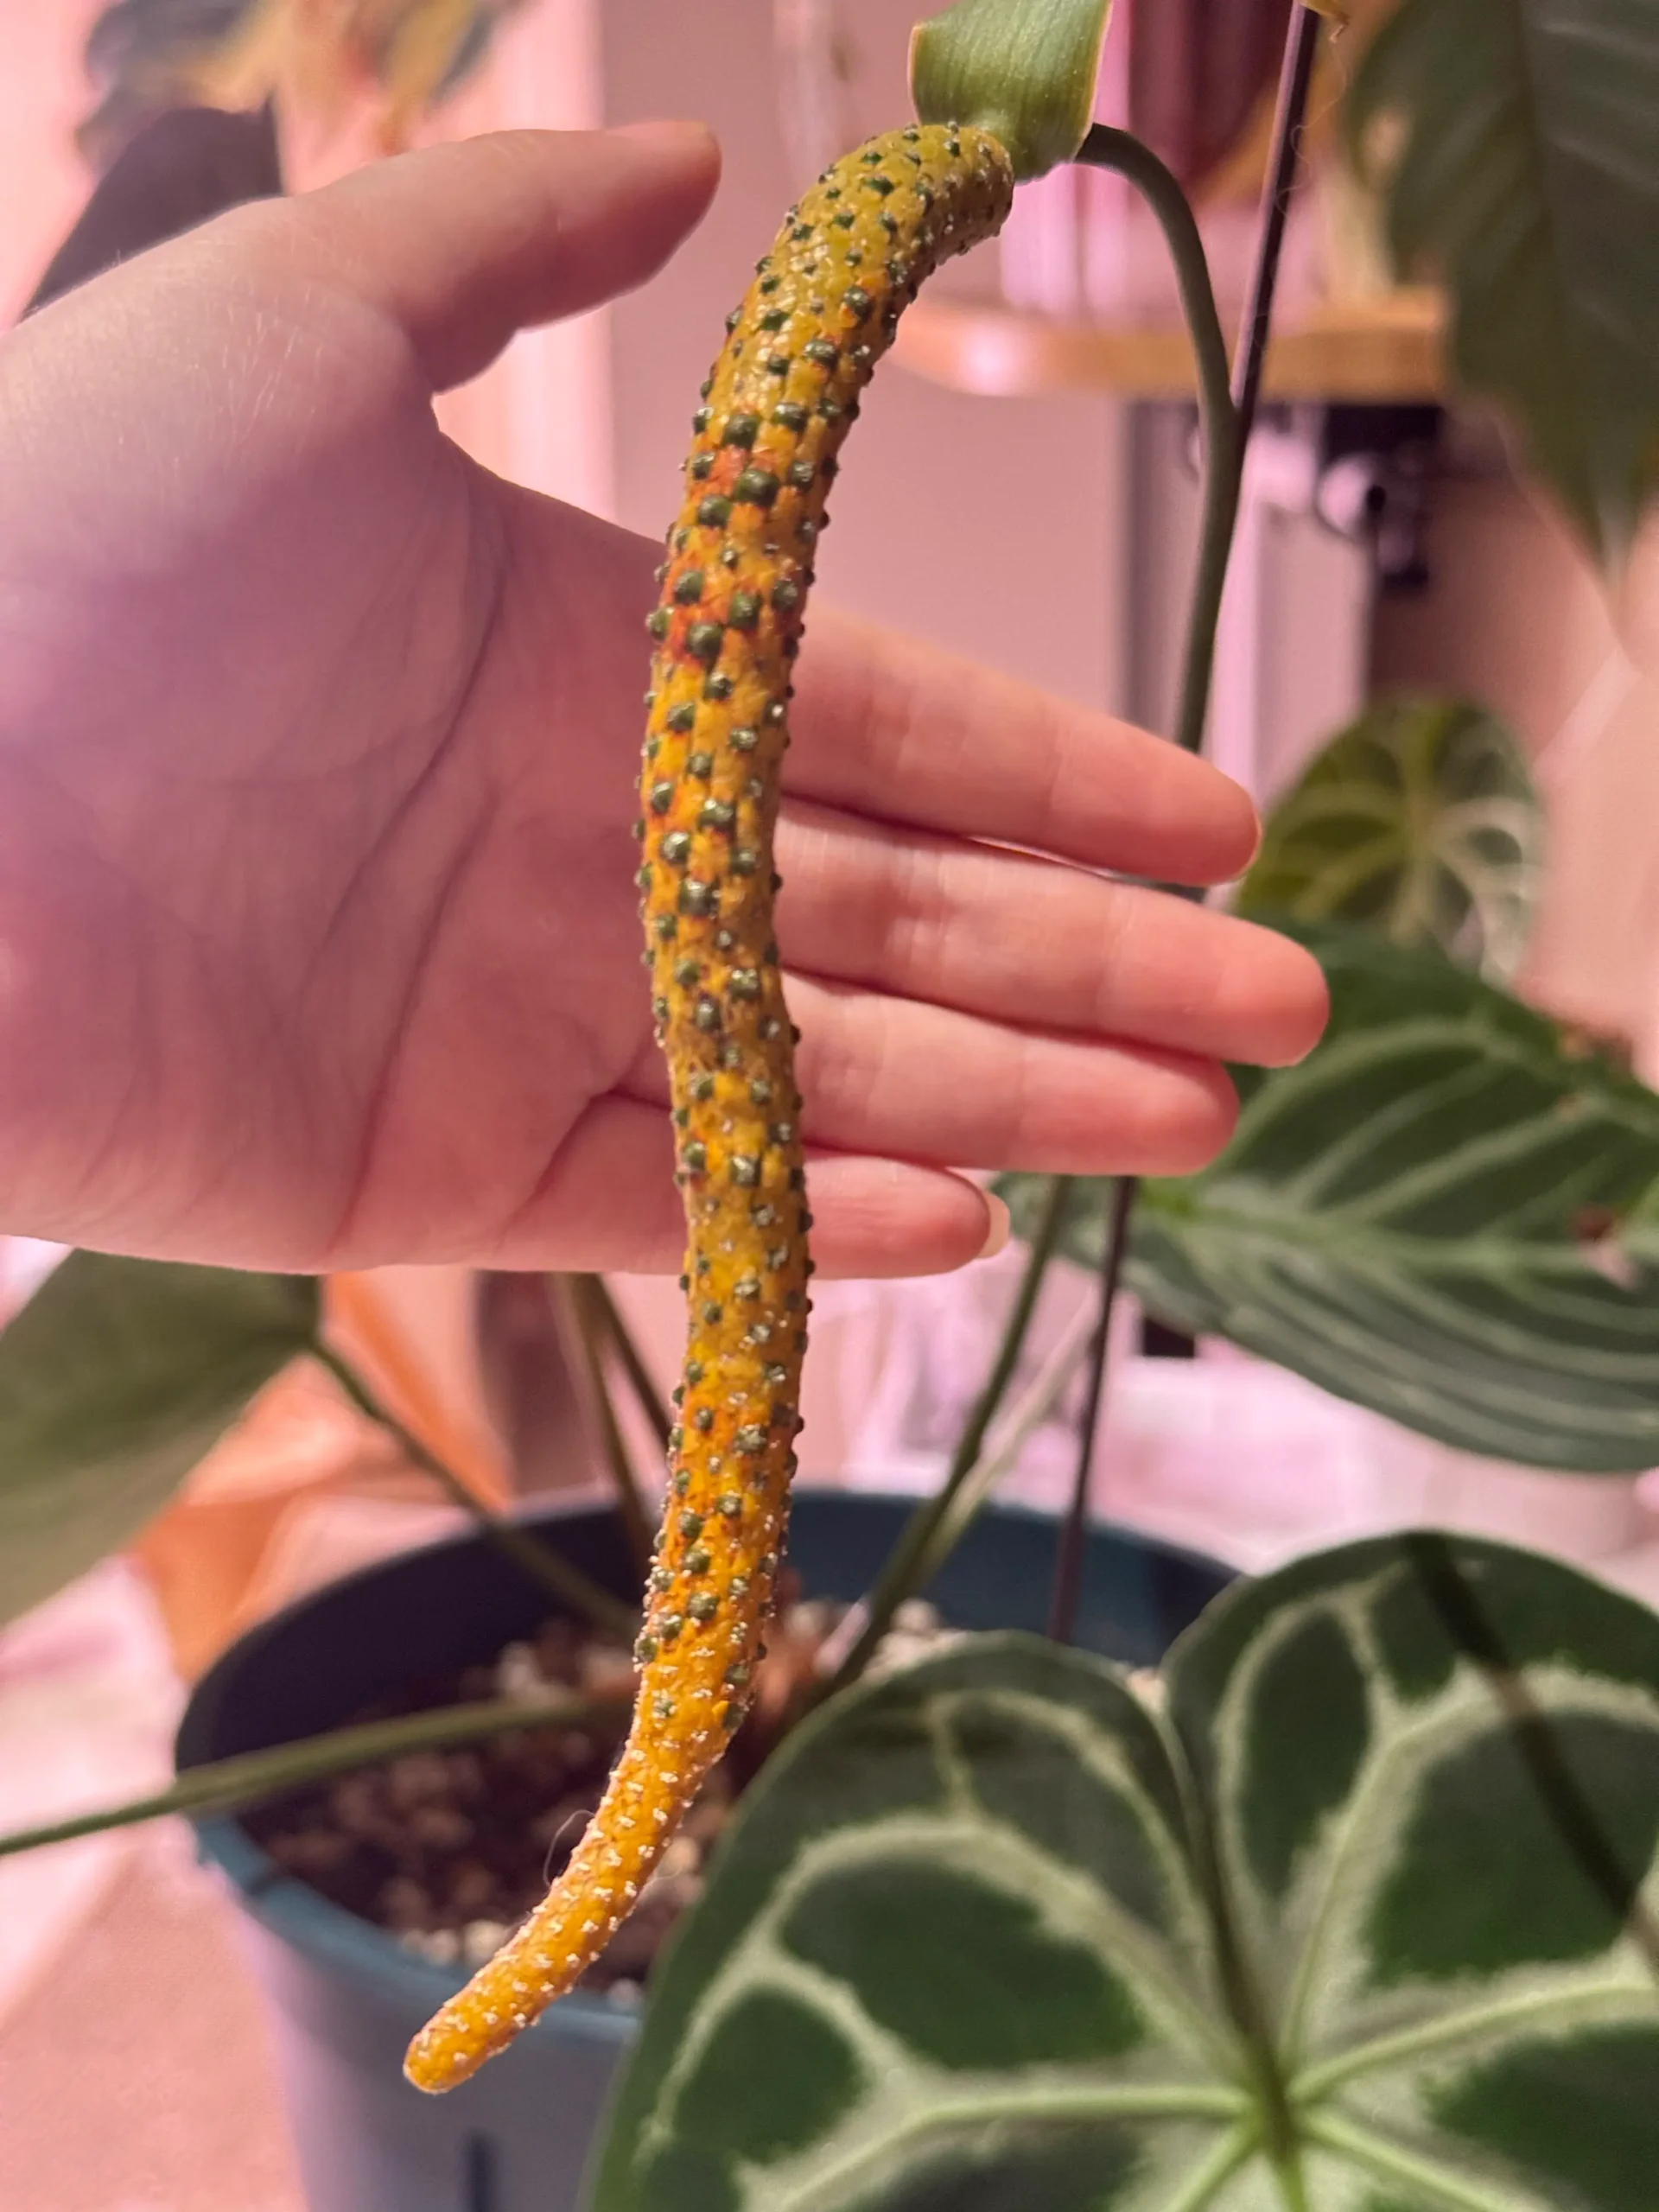
When the spadix enters the male phase, you’ll see fine, powdery yellow or white pollen emerging from the surface of the flowers, usually starting from the base and moving upward.
How to collect pollen:
- Fold a piece of dark paper (black or dark blue shows the pollen clearly) in half and hold it beneath the spadix
- Use a small, clean paintbrush or cotton swab to gently brush the pollen onto the paper
- Transfer the pollen into a small, labeled vial or microcentrifuge tube
- Add a silica desiccant packet and seal the bag; store in the freezer
Frozen pollen remains viable for up to 8–12 months, which solves the main logistical problem of home hybridization: your two parent plants rarely bloom at the same time. Collect and bank pollen from the male phase of Plant A, then use it later when Plant B enters its female phase.

The male pollen production phase — yellow pollen visible along the spadix surface. Dark paper makes collection much easier. Image: Granthuriums
Step 3: Apply Pollen to the Receptive Spadix
Once you have a target plant in its female (receptive) phase, take the pollen (fresh or thawed from frozen) and apply it with a small brush.
Practical tips:
- Wait until stigmatic fluid covers roughly two-thirds of the spadix before your first application — starting too early means the upper flowers aren’t yet receptive
- Apply pollen over 2–3 consecutive mornings as long as fluid is still present; repeat applications significantly improve coverage and success rate
- Don’t rush. The more thorough your pollen contact with the stigmatic fluid, the better the berry set
If you don’t have two plants blooming simultaneously and haven’t banked pollen, the workaround is to bring two spadices into contact. This low-tech approach — rubbing the male phase of one spadix against the female phase of another — has a surprisingly decent success rate among hobbyists.
Step 4: Watch for Success or Failure
In the weeks following pollination, the spadix will tell you everything.
Signs of successful pollination:
- The spadix stays firm and green rather than yellowing
- Small bumps appear on the surface — these are the developing berries
- The spadix gradually swells and changes color (often to dark green or red-purple, depending on species)
Signs of failure:
- The peduncle (stem below the spathe) begins to yellow
- The spadix softens and darkens abnormally
- The inflorescence collapses within 2–4 weeks of pollination
One important note: The spadix entering the male pollen phase after you’ve applied pollen does NOT mean failure. Many plants continue through the male phase even after successful pollination. Judge success by the peduncle and berry development, not the pollen production.

Figure 2 : A successfully pollinated inflorescence — the swelling along the spadix surface indicates berry development has begun. Image: Granthuriums
Step 5: Seed Development and Harvest Timing
Once pollination succeeds, the berries take 3 to 12+ months to fully ripen, depending on species. Crystal-type Anthuriums like crystallinum tend to ripen faster (around 3 months); some larger species like warocqueanum can take over a year.
| Species Group | Approximate Berry Ripening Time |
|---|---|
| A. crystallinum types | 3–4 months |
| A. magnificum types | 4–6 months |
| A. warocqueanum types | 8–14 months |
| A. andraeanum types | 3–5 months |
| Most hybrid crosses | Variable, typically 4–8 months |
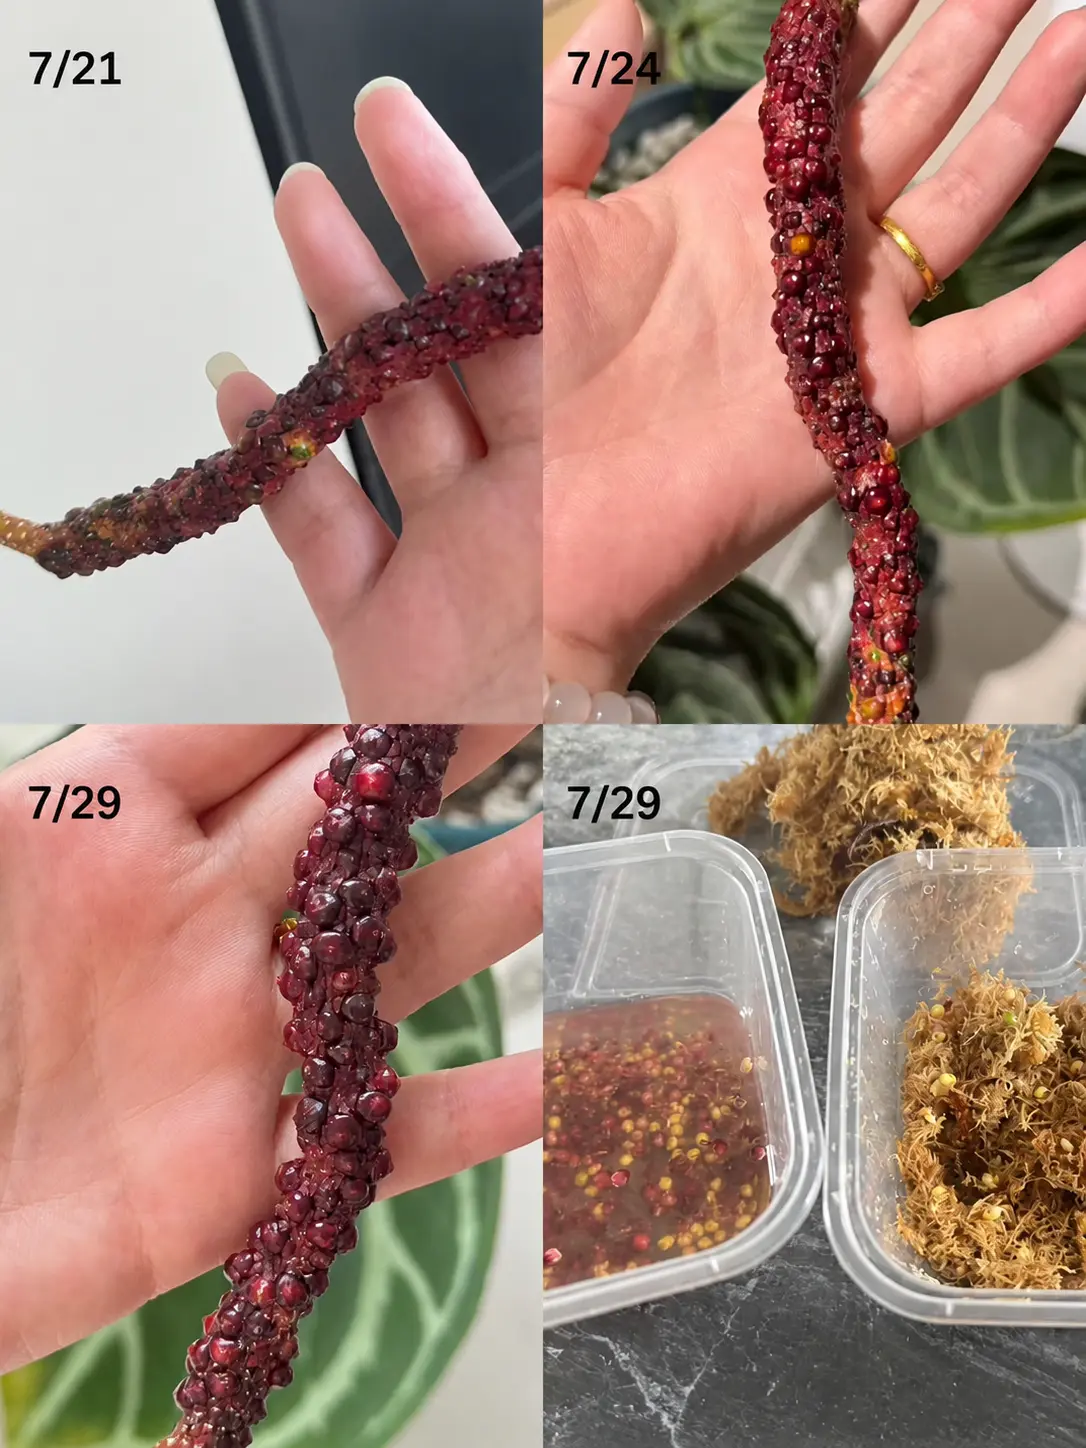
Berries are ripe when they’re plump, slightly soft, and the color has fully developed (usually deep red, purple, or orange, depending on the cross). At this stage they will almost pop off the spadix with gentle pressure. Don’t harvest early — seeds inside unripe berries have dramatically lower germination rates.
To extract seeds:
- Gently squeeze the ripe berries over a damp surface to press out the seeds — most berries contain 1–2 seeds
- Remove the fleshy pulp coating by rolling the seeds gently in water or sphagnum moss
- Do NOT let seeds dry out — Anthurium seeds die quickly if they desiccate
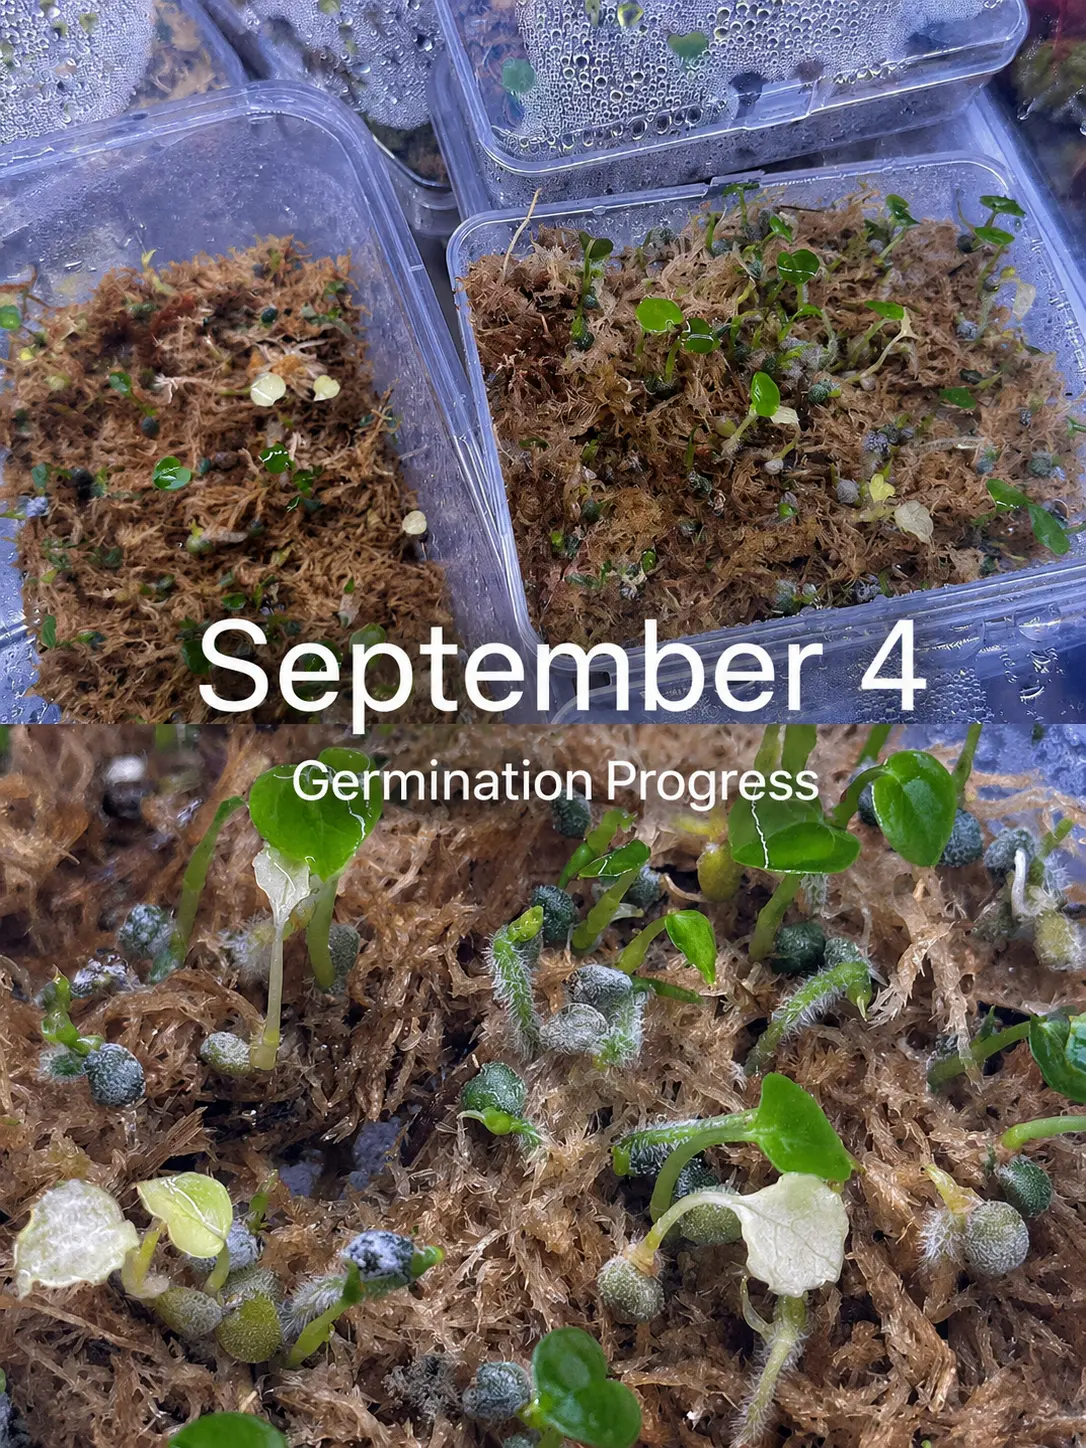
Step 6: Germination in Sphagnum Moss
Sphagnum moss is the undisputed top choice for germinating Anthurium seeds. Growers consistently report germination rates above 90% with this method. For a full breakdown of moss preparation, see the TPK guide on how to prepare sphagnum moss.
Germination setup:
- Use damp (not saturated) sphagnum moss in a clear plastic container
- Scatter seeds directly on the surface of the moss — do not bury them
- Seal the container with a lid to maintain humidity above 80%
- Place under bright indirect light or a grow light set up for propagation
- Keep temperature between 22–28°C (72–82°F)
Within 2–6 weeks, you’ll see tiny root hairs emerging from the seeds, followed by the first baby leaf. Once seedlings reach 3–4 cm tall and are pushing the lid, begin gradually opening the container to acclimate them to ambient humidity.
For more guidance on building a high-humidity environment for your seedlings, see how to build a mini indoor greenhouse and how to increase indoor humidity for plants.
A Note on Difficult Parents: Clarinervium, Flamingo Hybrids, and “King” Varieties
Not all Anthuriums hybridize willingly. If you’re planning crosses, there are three groups worth knowing about before you invest months of waiting.
Anthurium clarinervium is beloved for its dramatic white-veined, heart-shaped leaves — but in the collector community, it has a persistent reputation as a difficult and often unreliable hybrid parent. The species sits in the Calomystrium section, and crosses with other collector velvet-leaf species frequently fail to set fruit or produce viable seeds. Hobbyists who’ve attempted clarinervium crosses report low take rates, and to date, no widely distributed, market-recognized clarinervium hybrid has emerged with the visual impact collectors are looking for. The genetics are tricky and the payoff remains unproven.
Anthurium andraeanum — the classic flamingo flower — and its large-spathed cultivars like the “Queen” and “King” varieties face a different kind of problem: they’re taxonomically distant from the collector velvet-leaf species most of us want to cross them with. The genetics just don’t play well together. Crosses between flamingo varieties and collector foliage Anthuriums almost never take, and even when berries do form, germination rates are very low and the offspring rarely show the traits anyone was hoping for.
The collector community’s honest take: clarinervium, andraeanum Queen, and andraeanum King types are beautiful plants in their own right — but they are poor hybrid parents by current evidence. Save your pollination efforts for crosses with a documented track record.
Proven hobbyist-accessible crosses with higher success rates include: magnificum × crystallinum, crystallinum × forgetii, and magnificum × regale. These are the workhorse crosses of the home breeder community for a reason.
Quick Reference: Pollination Process Summary
| Stage | What You See | What To Do |
|---|---|---|
| Female phase | Glistening droplets on spadix surface | Apply pollen — this is your window |
| Male phase | Powdery yellow/white pollen on spadix | Collect and store pollen for future use |
| Post-pollination (success) | Firm, green spadix; bumps appearing | Monitor; feed plant well |
| Post-pollination (failure) | Yellowing peduncle, softening spadix | Note and try again next bloom |
| Berry ripening | Plump, soft, fully colored berries | Harvest gently; process immediately |
| Germination | Root hairs, then baby leaf on moss | Maintain humidity; add light |
Where to Start
If you’re new to this, start with a species that blooms frequently and handles stress well — Anthurium crystallinum and A. magnificum are both popular first choices. Avoid rare or expensive plants for your first attempt; the learning curve is real, and the first pollination often produces nothing.
Bank your pollen whenever a bloom appears. Even if you have nothing to cross it with right now, frozen pollen gives you flexibility later. And when you do get your first plump, berry-laden spadix — you’ll understand why growers say it’s one of the most satisfying experiences in the hobby.
Understanding the difference between asexual and sexual propagation is also worth reading before you dive in, since hybridization through seed is fundamentally different from taking cuttings or offshoots — and it opens up a different kind of creative potential entirely.
References
- Granthuriums — All About Anthurium Inflorescences and Pollination
- Trex Plants — Velvet Leaf Anthurium Flowering Stages
- Lutz Botanicals — How to Pollinate Anthuriums
- UF/IFAS — Breeding Techniques for Anthurium and Spathiphyllum
- Aroid Society — Anthurium Pollination
- Foliage Friend — How to Pollinate Anthurium